Esxi上で切り離されたLAB用ネットワークを構築し、固定IP割り当てる
Esxi上で切り離されたLAB用ネットワークを構築し、固定IP割り当てる
- 例えば、外部から自宅LABに繋げて遊びたい時に、NATを使ってポート変換し、外部からアクセス可能にすることを考えます。
- いろいろと忙しい最中、ちょっとした空き時間にLABれたら素敵だからです。
- しかしこの方式ですと、LABにマシンを追加するたびにNATをいじらなければなりません。
- 管理が面倒です。(例えば閉じたい時にたくさん閉じなければならず、面倒です。)
- なのでssh接続専用のゲートのようなものを作成することを考えます。
- その上でsshのゲートから分離されたLANを構築し、その中で各マシンに固定IPを設定します。
- もちろん、セキュリティ対策は万全にしておきます。(パスワードは複雑、暗号化方式はIPAの高度セキュリティに準拠、ポートは22を使わないなど。)
- これらの方式は物理環境では資材を用意する必要がありますが、現在では便利にEsxiなどの仮想ハイパーバイザーを利用することで簡単に実装できます。
ハイパーバイザー側の構成
- Esxiの仮想スイッチを新たに追加します。
- その際には物理ポートを設定しません。
- それ以外は特に値を変えずに作成します。
- さらにポートグループを作成します。
- こちらに分離させたい仮想マシンを繋げます。
- 先ほど作成した仮想スイッチを設定しま。
- それ以外は特に値を変えずに作成します。
ゲストOS側の構成
- 検証用に2台の仮想マシンを用意し、仮想NICを2本生やします。
- どちらか片方を先ほど作成したポートグループに属させます。
- あとは固定IPを割り当てます。
- 以下はubuntuの際の手順です。
- ubuntuの時はnetplanを使います。
- 設定ファイルを修正する前にバックアップを取ります。
$ sudo cp -p /etc/netplan/01-network-manager-all.yaml /etc/netplan/01-network-manager-all.yaml.bak
- 編集します。
$ sudo vim /etc/netplan/01-network-manager-all.yaml
$ sudo cat /etc/netplan/01-network-manager-all.yaml
# Let NetworkManager manage all devices on this system
network:
  version: 2
  renderer: NetworkManager
  ethernets:
    ens160:
      dhcp4: true
  ethernets:
    ens192:
      dhcp4: false
      addresses:
        - 172.8.1.2/24
- 設定を反映させます。
$ sudo netplan apply
- 確認します。
$ ip a
1: lo: <LOOPBACK,UP,LOWER_UP> mtu 65536 qdisc noqueue state UNKNOWN group default qlen 1000
    link/loopback 00:00:00:00:00:00 brd 00:00:00:00:00:00
    inet 127.0.0.1/8 scope host lo
       valid_lft forever preferred_lft forever
    inet6 ::1/128 scope host
       valid_lft forever preferred_lft forever
2: ens160: <BROADCAST,MULTICAST,UP,LOWER_UP> mtu 1500 qdisc mq state UP group default qlen 1000
    link/ether 00:0c:29:58:99:eb brd ff:ff:ff:ff:ff:ff
    altname enp3s0
    inet 192.168.11.41/24 brd 192.168.11.255 scope global dynamic noprefixroute ens160
       valid_lft 172607sec preferred_lft 172607sec
    inet6 fe80::20c:29ff:fe58:99eb/64 scope link
       valid_lft forever preferred_lft forever
3: ens192: <BROADCAST,MULTICAST,UP,LOWER_UP> mtu 1500 qdisc mq state UP group default qlen 1000
    link/ether 00:0c:29:58:99:f5 brd ff:ff:ff:ff:ff:ff
    altname enp11s0
    inet 172.8.1.2/24 brd 172.8.1.255 scope global noprefixroute ens192
       valid_lft forever preferred_lft forever
    inet6 fe80::20c:29ff:fe58:99f5/64 scope link
       valid_lft forever preferred_lft forever
- 同じようにもう一台も設定します。
$ sudo cat /etc/netplan/01-network-manager-all.yaml
# Let NetworkManager manage all devices on this system
network:
  version: 2
  renderer: NetworkManager
  renderer: NetworkManager
  ethernets:
    ens160:
      dhcp4: true
  ethernets:
    ens192:
      dhcp4: false
      addresses:
        - 172.8.1.3/24
- このように設定されました。
$ ip a
1: lo: <LOOPBACK,UP,LOWER_UP> mtu 65536 qdisc noqueue state UNKNOWN group default qlen 1000
    link/loopback 00:00:00:00:00:00 brd 00:00:00:00:00:00
    inet 127.0.0.1/8 scope host lo
       valid_lft forever preferred_lft forever
    inet6 ::1/128 scope host
       valid_lft forever preferred_lft forever
2: ens160: <BROADCAST,MULTICAST,UP,LOWER_UP> mtu 1500 qdisc mq state UP group default qlen 1000
    link/ether 00:0c:29:8c:88:93 brd ff:ff:ff:ff:ff:ff
    altname enp3s0
    inet 192.168.11.39/24 brd 192.168.11.255 scope global dynamic noprefixroute ens160
       valid_lft 172799sec preferred_lft 172799sec
    inet6 fe80::20c:29ff:fe8c:8893/64 scope link
       valid_lft forever preferred_lft forever
3: ens192: <BROADCAST,MULTICAST,UP,LOWER_UP> mtu 1500 qdisc mq state UP group default qlen 1000
    link/ether 00:0c:29:8c:88:9d brd ff:ff:ff:ff:ff:ff
    altname enp11s0
    inet 172.8.1.3/24 brd 172.8.1.255 scope global noprefixroute ens192
       valid_lft forever preferred_lft forever
    inet6 fe80::20c:29ff:fe8c:889d/64 scope link
       valid_lft forever preferred_lft forever
ttmp@ttmp-virtual-machine:~$
- お互いに疎通が取れることを確認します。
$ ping 172.8.1.2
PING 172.8.1.2 (172.8.1.2) 56(84) bytes of data.
64 bytes from 172.8.1.2: icmp_seq=1 ttl=64 time=0.249 ms
64 bytes from 172.8.1.2: icmp_seq=2 ttl=64 time=0.385 ms
64 bytes from 172.8.1.2: icmp_seq=3 ttl=64 time=0.398 ms
^C
--- 172.8.1.2 ping statistics ---
3 packets transmitted, 3 received, 0% packet loss, time 2038ms
rtt min/avg/max/mdev = 0.249/0.344/0.398/0.067 ms
$ ping 172.8.1.3
PING 172.8.1.3 (172.8.1.3) 56(84) bytes of data.
64 bytes from 172.8.1.3: icmp_seq=1 ttl=64 time=0.106 ms
64 bytes from 172.8.1.3: icmp_seq=2 ttl=64 time=0.488 ms
^C
--- 172.8.1.3 ping statistics ---
2 packets transmitted, 2 received, 0% packet loss, time 1007ms
rtt min/avg/max/mdev = 0.106/0.297/0.488/0.191 ms
$ ssh user@172.8.1.3
user@172.8.1.3's password:
Welcome to Ubuntu 22.04.3 LTS (GNU/Linux 6.2.0-36-generic x86_64)

 * Documentation:  https://help.ubuntu.com
 * Management:     https://landscape.canonical.com
 * Support:        https://ubuntu.com/advantage

Expanded Security Maintenance for Applications is not enabled.

119のアップデートはすぐに適用されます。
これらの更新の75は、標準のセキュリティ更新です。
これらの追加アップデートを確認するには次を実行してください: apt list --upgradable

Enable ESM Apps to receive additional future security updates.
See https://ubuntu.com/esm or run: sudo pro status

Last login: Sun Dec 24 23:44:37 2023 from 192.168.11.3
user@user-virtual-machine:~$ ip a
1: lo: <LOOPBACK,UP,LOWER_UP> mtu 65536 qdisc noqueue state UNKNOWN group default qlen 1000
    link/loopback 00:00:00:00:00:00 brd 00:00:00:00:00:00
    inet 127.0.0.1/8 scope host lo
       valid_lft forever preferred_lft forever
    inet6 ::1/128 scope host
       valid_lft forever preferred_lft forever
2: ens160: <BROADCAST,MULTICAST,UP,LOWER_UP> mtu 1500 qdisc mq state UP group default qlen 1000
    link/ether 00:0c:29:8c:88:93 brd ff:ff:ff:ff:ff:ff
    altname enp3s0
    inet 192.168.11.39/24 brd 192.168.11.255 scope global dynamic noprefixroute ens160
       valid_lft 172716sec preferred_lft 172716sec
    inet6 fe80::20c:29ff:fe8c:8893/64 scope link
       valid_lft forever preferred_lft forever
3: ens192: <BROADCAST,MULTICAST,UP,LOWER_UP> mtu 1500 qdisc mq state UP group default qlen 1000
    link/ether 00:0c:29:8c:88:9d brd ff:ff:ff:ff:ff:ff
    altname enp11s0
    inet 172.8.1.3/24 brd 172.8.1.255 scope global noprefixroute ens192
       valid_lft forever preferred_lft forever
    inet6 fe80::20c:29ff:fe8c:889d/64 scope link
       valid_lft forever preferred_lft forever
- ssh接続できました。
まとめ
■
VDDK8.02のサンプルプログラムをビルドして動かしてみる
- Virtual Disk Development Kit (VDDK)は、VMWareが出している仮想ディスクを操作するライブラリです。仮想ディスクの操作の自動化などに役立ちます。
- 今回はVDDK8.02をダウンロードをしてビルド環境を整え、使用できるところまで持って行こうと思います。
環境
- Ubuntu22.04
- VDDK8.02
ビルド環境構築
- ubuntuは最小構成でインストールします。
- インストール後、apt update, apt upgradeで最新にしておきます。
VDDKのダウンロード
- 以下のサイトからダウンロードします。
- https://developer.vmware.com/web/sdk/vddk/
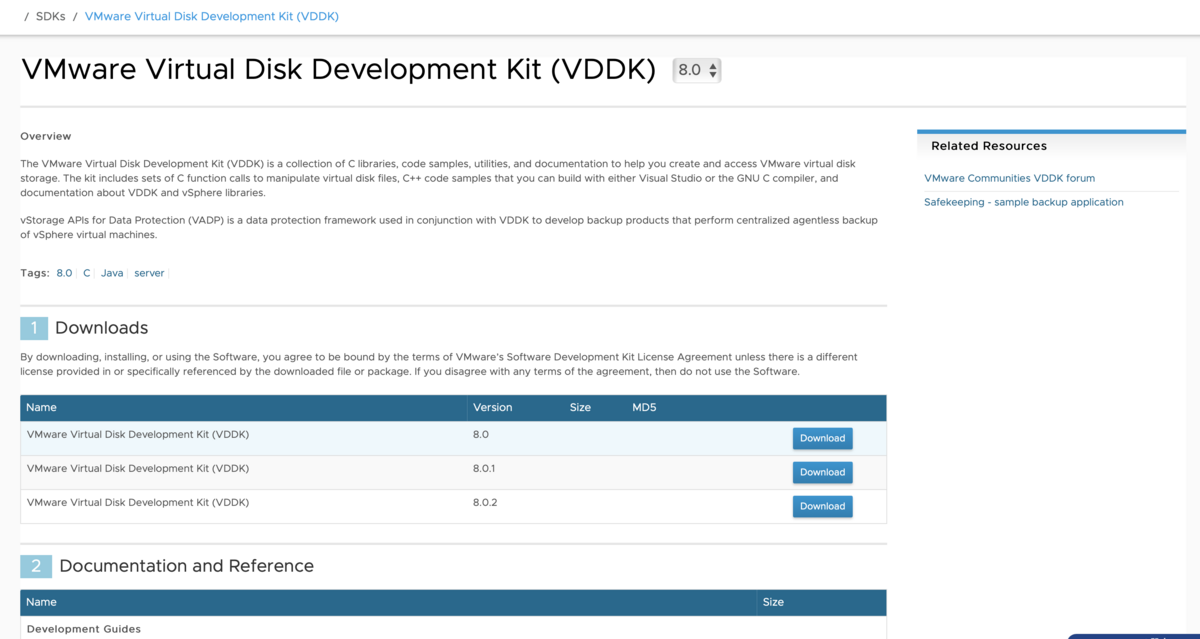
- 今回はlinux用をダウンロードします。
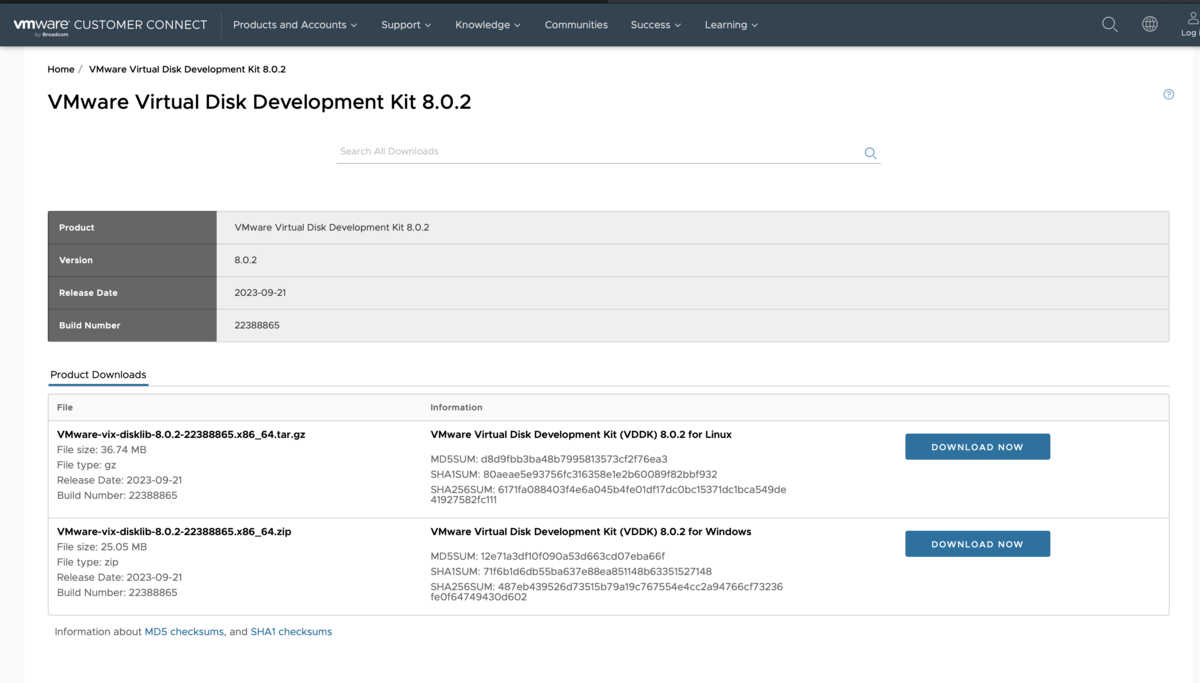
- ダウンロードしたファイルはscpで開発用のサーバーに送ります。
- ubuntuの初期状態ではopenssh-serverが入っていないのでインストールします。
% scp ./VMware-vix-disklib-8.0.2-22388865.x86_64.tar ${USER}@${IP}:/tmp
- 解凍
$ tar -xvf VMware-vix-disklib-8.0.2-22388865.x86_64.tar
- 解凍したフォルダは以下のような構成になっています。
$ ll
合計 36
drwxr-xr-x  7 ttmp ttmp 4096  9月  6 15:49 ./
drwxr-x--- 15 ttmp ttmp 4096 12月 16 12:34 ../
-rw-r--r--  1 ttmp ttmp 8068  9月  6 15:49 FILES
drwxr-xr-x  2 ttmp ttmp 4096 12月 16 12:34 bin64/
drwxr-xr-x  6 ttmp ttmp 4096 12月 16 12:34 doc/
drwxr-xr-x  2 ttmp ttmp 4096 12月 16 12:34 include/
drwxr-xr-x  2 ttmp ttmp 4096  9月  6 15:37 lib32/
drwxr-xr-x  2 ttmp ttmp 4096 12月 16 12:34 lib64/
- lib32とlib64にはビルドに必要なライブラリ類が入っています。
- docにはサンプルプログラムやエラーコードが記されたドキュメントが入っています。
- サンプルプログラムのフォルダを見てみます。
$ ll
合計 3832
drwxr-xr-x 2 ttmp ttmp    4096  9月  6 15:45 ./
drwxr-xr-x 3 ttmp ttmp    4096 12月 16 12:34 ../
-r--r--r-- 1 ttmp ttmp     596  9月  6 15:44 Makefile
-rwxr-xr-x 1 ttmp ttmp 1777024  9月  6 15:44 vixDiskLibSample*
-r--r--r-- 1 ttmp ttmp   95768  9月  6 15:43 vixDiskLibSample.cpp
-rwxr-xr-x 1 ttmp ttmp 2034352  9月  6 15:45 vixMntapiSample*
- makeファイルがありました。
- 中身を見てみましょう。
$ cat Makefile
INCLUDEDIR=../../../include
LIBDIR=../../../lib64
LIBS=-ldl -lz -lcurl -lssl -lcrypto -lcares

ifdef VIX_AIO_BUFPOOL_SIZE
CXXFLAGS+= -DVIX_AIO_BUFPOOL_SIZE=$(VIX_AIO_BUFPOOL_SIZE)
endif

CXXFLAGS+= -std=c++1y -lpthread

all: vix-disklib-sample vix-mntapi-sample

vix-disklib-sample: vixDiskLibSample.cpp
    $(CXX) $(CXXFLAGS) -o $@ -I$(INCLUDEDIR) -L$(LIBDIR) $? $(LIBS) -lvixDiskLib

vix-mntapi-sample:  vixDiskLibSample.cpp
    $(CXX) $(CXXFLAGS) -o $@ -DFOR_MNTAPI -I$(INCLUDEDIR) -L$(LIBDIR) $? $(LIBS) \
       -lfuse -lvixDiskLib -lvixMntapi

clean:
    $(RM) -f vix-disklib-sample vix-mntapi-sample
- 先ほどのlib64へリンクするためのパスが設定されていることがわかります。
- 現状ではいくつか足りないものはありますが、とりあえずmakeコマンドを実行してみましょう。
$ make
コマンド 'make' が見つかりません。次の方法でインストールできます:
sudo apt install make        # version 4.3-4.1build1, or
sudo apt install make-guile  # version 4.3-4.1build1
- makeコマンドが見つかりませんと言われてしまいました。インストールして再実行してみます。
$ sudo apt install make
[sudo] ttmp のパスワード:
パッケージリストを読み込んでいます... 完了
依存関係ツリーを作成しています... 完了
状態情報を読み取っています... 完了
以下のパッケージが自動でインストールされましたが、もう必要とされていません:
  libflashrom1 libftdi1-2 libllvm13
これを削除するには 'sudo apt autoremove' を利用してください。
提案パッケージ:
  make-doc
以下のパッケージが新たにインストールされます:
  make
アップグレード: 0 個、新規インストール: 1 個、削除: 0 個、保留: 6 個。
180 kB のアーカイブを取得する必要があります。
この操作後に追加で 426 kB のディスク容量が消費されます。
取得:1 http://jp.archive.ubuntu.com/ubuntu jammy/main amd64 make amd64 4.3-4.1build1 [180 kB]
180 kB を 3秒 で取得しました (62.4 kB/s)
以前に未選択のパッケージ make を選択しています。
(データベースを読み込んでいます ... 現在 180557 個のファイルとディレクトリがインストールされています。)
.../make_4.3-4.1build1_amd64.deb を展開する準備をしています ...
make (4.3-4.1build1) を展開しています...
make (4.3-4.1build1) を設定しています ...
man-db (2.10.2-1) のトリガを処理しています ...
$ make
g++ -std=c++1y -lpthread -o vix-disklib-sample -I../../../include -L../../../lib64 vixDiskLibSample.cpp -ldl -lz -lcurl -lssl -lcrypto -lcares -lvixDiskLib
make: g++: そのようなファイルやディレクトリはありません
make: *** [Makefile:14: vix-disklib-sample] エラー 127
$ sudo apt install g++
パッケージリストを読み込んでいます... 完了
依存関係ツリーを作成しています... 完了
状態情報を読み取っています... 完了
以下のパッケージが自動でインストールされましたが、もう必要とされていません:
  libflashrom1 libftdi1-2 libllvm13
これを削除するには 'sudo apt autoremove' を利用してください。
以下の追加パッケージがインストールされます:
  binutils binutils-common binutils-x86-64-linux-gnu g++-11 gcc gcc-11 libasan6 libbinutils libc-dev-bin libc-devtools libc6-dev libcc1-0 libcrypt-dev libctf-nobfd0 libctf0 libgcc-11-dev libitm1 liblsan0 libnsl-dev libquadmath0
  libstdc++-11-dev libtirpc-dev libtsan0 libubsan1 linux-libc-dev manpages-dev rpcsvc-proto
提案パッケージ:
  binutils-doc g++-multilib g++-11-multilib gcc-11-doc gcc-multilib autoconf automake libtool flex bison gcc-doc gcc-11-multilib gcc-11-locales glibc-doc libstdc++-11-doc
以下のパッケージが新たにインストールされます:
  binutils binutils-common binutils-x86-64-linux-gnu g++ g++-11 gcc gcc-11 libasan6 libbinutils libc-dev-bin libc-devtools libc6-dev libcc1-0 libcrypt-dev libctf-nobfd0 libctf0 libgcc-11-dev libitm1 liblsan0 libnsl-dev libquadmath0
  libstdc++-11-dev libtirpc-dev libtsan0 libubsan1 linux-libc-dev manpages-dev rpcsvc-proto
アップグレード: 0 個、新規インストール: 28 個、削除: 0 個、保留: 6 個。
52.7 MB のアーカイブを取得する必要があります。
この操作後に追加で 180 MB のディスク容量が消費されます。
続行しますか? [Y/n] y
         : 以下略
$ make
g++ -std=c++1y -lpthread -o vix-disklib-sample -I../../../include -L../../../lib64 vixDiskLibSample.cpp -ldl -lz -lcurl -lssl -lcrypto -lcares -lvixDiskLib
g++ -std=c++1y -lpthread -o vix-mntapi-sample -DFOR_MNTAPI -I../../../include -L../../../lib64 vixDiskLibSample.cpp -ldl -lz -lcurl -lssl -lcrypto -lcares \
   -lfuse -lvixDiskLib -lvixMntapi
/usr/bin/ld: -lfuse が見つかりません: そのようなファイルやディレクトリはありません
collect2: error: ld returned 1 exit status
make: *** [Makefile:17: vix-mntapi-sample] エラー 1
/usr/bin/ld: -lfuse が見つかりません: そのようなファイルやディレクトリはありませんと言われてしまいました。- libfuseがないようです。
- FUSEはカーネルとの橋渡しを行うライブラリのようです。
$ ldconfig -p | grep libfuse
    libfuse3.so.3 (libc6,x86-64) => /lib/x86_64-linux-gnu/libfuse3.so.3
- こちらにライブラリがあるようです。
$ echo $LD_LIBRARY_PATH
LD_LIBRARY_PATHには何も設定されていません。つまりビルドした時にはこちらのライブラリがみえていません。今回インストールしたlib64も
LD_LIBRARY_PATHに含めてみます。
$ export LD_LIBRARY_PATH=/home/ttmp/vmware-vix-disklib-distrib/lib64:/lib/x86_64-linux-gnu
- makeしてみます。
$ make
g++ -std=c++1y -lpthread -o vix-mntapi-sample -DFOR_MNTAPI -I../../../include -L../../../lib64 vixDiskLibSample.cpp -ldl -lz -lcurl -lssl -lcrypto -lcares \
   -lfuse -lvixDiskLib -lvixMntapi
/usr/bin/ld: -lfuse が見つかりません: そのようなファイルやディレクトリはありません
collect2: error: ld returned 1 exit status
make: *** [Makefile:17: vix-mntapi-sample] エラー 1
- まだダメなようです。どうやらライブラリ名が
libfuse.soでないといけないようです。 libfuse3.so.3を名称を変え、/home/ttmp/vmware-vix-disklib-distrib/lib64においてみます。ついでにLD_LIBRARY_PATHも変更します。
$ export LD_LIBRARY_PATH=/home/ttmp/vmware-vix-disklib-distrib/lib64
$ ll /lib/x86_64-linux-gnu/libfuse3.so.3
lrwxrwxrwx 1 root root 18 12月 16 10:56 /lib/x86_64-linux-gnu/libfuse3.so.3 -> libfuse3.so.3.10.5
$ sudo find / -name libfuse3.so.3.10.5
find: ‘/run/user/1000/doc’: 許可がありません
find: ‘/run/user/1000/gvfs’: 許可がありません
/usr/lib/x86_64-linux-gnu/libfuse3.so.3.10.5
$ cp -p /usr/lib/x86_64-linux-gnu/libfuse3.so.3.10.5 /home/ttmp/vmware-vix-disklib-distrib/lib64/libfuse.so
- makeしてみます。
$ make
g++ -std=c++1y -lpthread -o vix-mntapi-sample -DFOR_MNTAPI -I../../../include -L../../../lib64 vixDiskLibSample.cpp -ldl -lz -lcurl -lssl -lcrypto -lcares \
   -lfuse -lvixDiskLib -lvixMntapi
/usr/bin/ld: warning: libfuse.so.2, needed by ../../../lib64/libvixMntapi.so, not found (try using -rpath or -rpath-link)
/usr/bin/ld: ../../../lib64/libvixMntapi.so: undefined reference to `fuse_opt_add_opt@FUSE_2.5'
/usr/bin/ld: ../../../lib64/libvixMntapi.so: undefined reference to `fuse_exit@FUSE_2.2'
/usr/bin/ld: ../../../lib64/libvixMntapi.so: undefined reference to `fuse_mount_compat25@FUSE_2.6'
/usr/bin/ld: ../../../lib64/libvixMntapi.so: undefined reference to `fuse_destroy@FUSE_2.2'
/usr/bin/ld: ../../../lib64/libvixMntapi.so: undefined reference to `fuse_unmount_compat22@FUSE_2.6'
/usr/bin/ld: ../../../lib64/libvixMntapi.so: undefined reference to `fuse_new_compat25@FUSE_2.6'
/usr/bin/ld: ../../../lib64/libvixMntapi.so: undefined reference to `fuse_opt_free_args@FUSE_2.5'
/usr/bin/ld: ../../../lib64/libvixMntapi.so: undefined reference to `fuse_opt_add_arg@FUSE_2.5'
/usr/bin/ld: ../../../lib64/libvixMntapi.so: undefined reference to `fuse_loop@FUSE_2.2'
collect2: error: ld returned 1 exit status
make: *** [Makefile:17: vix-mntapi-sample] エラー 1
$ sudo apt install libfuse2
パッケージリストを読み込んでいます... 完了
依存関係ツリーを作成しています... 完了
状態情報を読み取っています... 完了
以下のパッケージが自動でインストールされましたが、もう必要とされていません:
  libflashrom1 libftdi1-2 libllvm13
これを削除するには 'sudo apt autoremove' を利用してください。
以下のパッケージが新たにインストールされます:
  libfuse2
アップグレード: 0 個、新規インストール: 1 個、削除: 0 個、保留: 6 個。
90.3 kB のアーカイブを取得する必要があります。
この操作後に追加で 330 kB のディスク容量が消費されます。
取得:1 http://jp.archive.ubuntu.com/ubuntu jammy/universe amd64 libfuse2 amd64 2.9.9-5ubuntu3 [90.3 kB]
90.3 kB を 1秒 で取得しました (71.9 kB/s)
以前に未選択のパッケージ libfuse2:amd64 を選択しています。
(データベースを読み込んでいます ... 現在 185815 個のファイルとディレクトリがインストールされています。)
.../libfuse2_2.9.9-5ubuntu3_amd64.deb を展開する準備をしています ...
libfuse2:amd64 (2.9.9-5ubuntu3) を展開しています...
libfuse2:amd64 (2.9.9-5ubuntu3) を設定しています ...
libc-bin (2.35-0ubuntu3.5) のトリガを処理しています ...
ttmp@ttmp-virtual-machine:~/vmware-vix-disklib-distrib/doc/samples/diskLib$ ldconfig -p | grep libfuse
    libfuse3.so.3 (libc6,x86-64) => /lib/x86_64-linux-gnu/libfuse3.so.3
    libfuse.so.2 (libc6,x86-64) => /lib/x86_64-linux-gnu/libfuse.so.2
ttmp@ttmp-virtual-machine:~/vmware-vix-disklib-distrib/doc/samples/diskLib$
- 2系が入ったようです。同じようにlib64に配置してみます。
$ ll /lib/x86_64-linux-gnu/libfuse.so.2
lrwxrwxrwx 1 root root 16  3月 23  2022 /lib/x86_64-linux-gnu/libfuse.so.2 -> libfuse.so.2.9.9
$ sudo find / -name libfuse.so.2
find: ‘/run/user/1000/doc’: 許可がありません
find: ‘/run/user/1000/gvfs’: 許可がありません
/usr/lib/x86_64-linux-gnu/libfuse.so.2
$ cp -p /usr/lib/x86_64-linux-gnu/libfuse.so.2 /home/ttmp/vmware-vix-disklib-distrib/lib64/libfuse.so
- makeしてみます。
$ make
g++ -std=c++1y -lpthread -o vix-mntapi-sample -DFOR_MNTAPI -I../../../include -L../../../lib64 vixDiskLibSample.cpp -ldl -lz -lcurl -lssl -lcrypto -lcares \
   -lfuse -lvixDiskLib -lvixMntapi
- makeできました。
$ ll
合計 5048
drwxr-xr-x 2 ttmp ttmp    4096 12月 16 14:26 ./
drwxr-xr-x 3 ttmp ttmp    4096 12月 16 12:34 ../
-r--r--r-- 1 ttmp ttmp     596  9月  6 15:44 Makefile
-rwxrwxr-x 1 ttmp ttmp  565296 12月 16 12:42 vix-disklib-sample*
-rwxrwxr-x 1 ttmp ttmp  674144 12月 16 14:26 vix-mntapi-sample*
-rwxr-xr-x 1 ttmp ttmp 1777024  9月  6 15:44 vixDiskLibSample*
-r--r--r-- 1 ttmp ttmp   95768  9月  6 15:43 vixDiskLibSample.cpp
-rwxr-xr-x 1 ttmp ttmp 2034352  9月  6 15:45 vixMntapiSample*
- コマンドが実行できました。
$ ./vix-disklib-sample
Error: Too few arguments. See usage below.

Usage: vixdisklibsample.exe command [options] diskPath

List of commands (all commands are mutually exclusive):
 -create : creates a sparse virtual disk with capacity specified by -cap
 -redo parentPath : creates a redo log 'diskPath' for base disk 'parentPath'
 -info : displays information for specified virtual disk
 -dump : dumps the contents of specified range of sectors in hexadecimal
 -mount : mount the virtual disk specified
 -fill : fills specified range of sectors with byte value specified by -val
 -wmeta key value : writes (key,value) entry into disk's metadata table
 -rmeta key : displays the value of the specified metada entry
 -meta : dumps all entries of the disk's metadata
 -clone sourcePath : clone source vmdk possibly to a remote site
 -compress type: specify the compression type for nbd transport mode
 -readbench blocksize: Does a read benchmark on a disk using the
specified I/O block size (in sectors).
 -writebench blocksize: Does a write benchmark on a disk using the
specified I/O block size (in sectors). WARNING: This will
overwrite the contents of the disk specified.
 -readasyncbench blocksize: Does an async read benchmark on a disk using the
specified I/O block size (in sectors).
 -writeasyncbench blocksize: Does an async write benchmark on a disk using the
specified I/O block size (in sectors). WARNING: This will
overwrite the contents of the disk specified.
 -getallocatedblocks : gets allocated block list on a disk using the
specified I/O block size (in sectors).
 -check repair: Check a sparse disk for internal consistency, where repair is a boolean value to indicate if a repair operation should be attempted.

options:
 -adapter [ide|scsi] : bus adapter type for 'create' option (default='scsi')
 -start n : start sector for 'dump/fill' options (default=0)
 -count n : number of sectors for 'dump/fill' options (default=1)
 -val byte : byte value to fill with for 'write' option (default=255)
 -cap megabytes : capacity in MB for -create option (default=100)
 -single : open file as single disk link (default=open entire chain)
 -multithread n: start n threads and copy the file to n new files
 -host hostname : hostname/IP address of VC/vSphere host (Mandatory)
 -user userid : user name on host (Mandatory)
 -password password : password on host. (Mandatory)
 -cookie cookie : cookie from existing authenticated session on host. (Optional)
 -port port : port to use to connect to VC/ESXi host (default = 443)
 -nfchostport port : port to use to establish NFC connection to ESXi host (default = 902)
 -vm moref=id : id is the managed object reference of the VM
 -fcdid id : id is the uuid of the vStorage Object
 -ds ds : ds is the managed object reference of the Datastore
 -diskFolder diskFolder : the folder on the datastore
 -fcdssid ssid : id is the uuid of the snapshot of the vStorage Object
 -libdir dir : Folder location of the VDDK installation. On Windows, the bin folder holds the plugin.  On Linux, it is the lib64 directory
 -initex configfile : Specify path and filename of config file
 -ssmoref moref : Managed object reference of VM snapshot
 -mode mode : Mode string to pass into VixDiskLib_ConnectEx. Valid modes are: nbd, nbdssl, san, hotadd
 -thumb string : Provides a SSL thumbprint string for validation. Format: xx:xx:xx:xx:xx:xx:xx:xx:xx:xx:xx:xx:xx:xx:xx:xx:xx:xx:xx:xx
 -chunksize n : number of sectors as a chunk to query allocated blocks
 -lssize n : number of logical sector size for -create and -clone option (default = 0)
 -pssize n : number of physical sector size for -create and -clone option (default = 0)
 -unbuffered: use VIXDISKLIB_FLAG_OPEN_UNBUFFERED flag
 -cleanup: perform cleanup firstly
- つぎは実際にAPIを使ってみようと思います。
unityでキャラクターをリソース化する
unity開発のメモ。
unityではキャラクターをシーンにドラッグ&ドロップで配置可能だが、コードを使用して登場させることも可能。 自分が感じる用途としては、コードで配置できるので位置を制御したり、大人数を配置するのにきっと楽。
キャラクターをリソース化する
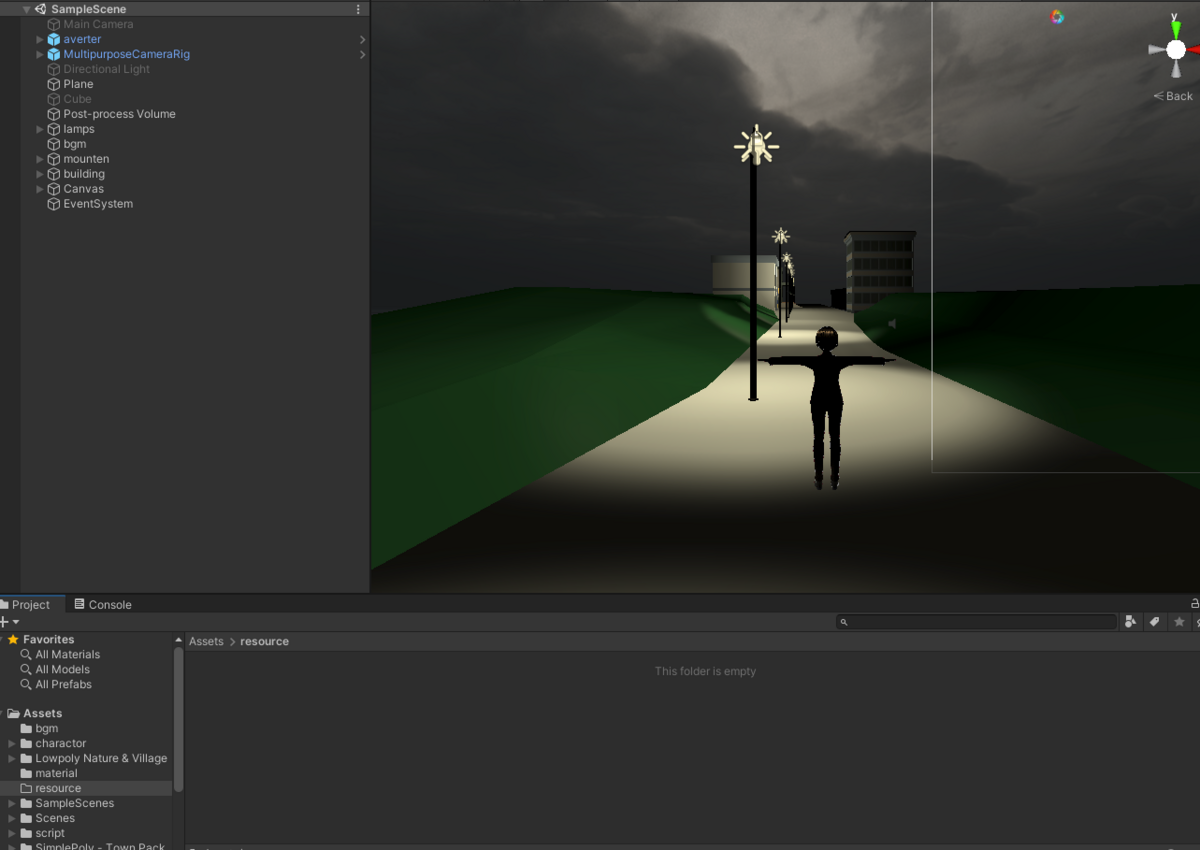
まずはコードから呼び出せるように、キャラクターをリソース化する。 ヒエラルキーからキャラクターのオブジェクトを選択して、フォルダーへD&D。 このとき、フォルダ名は「Resources」にすること。
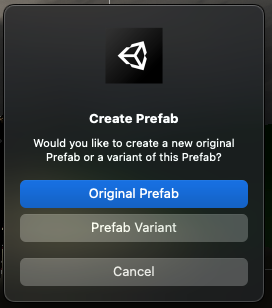
ここで「Original Prefab」を選択。
選択するとこんな感じになる 。シーン上のキャラクターは不要になるので削除する。
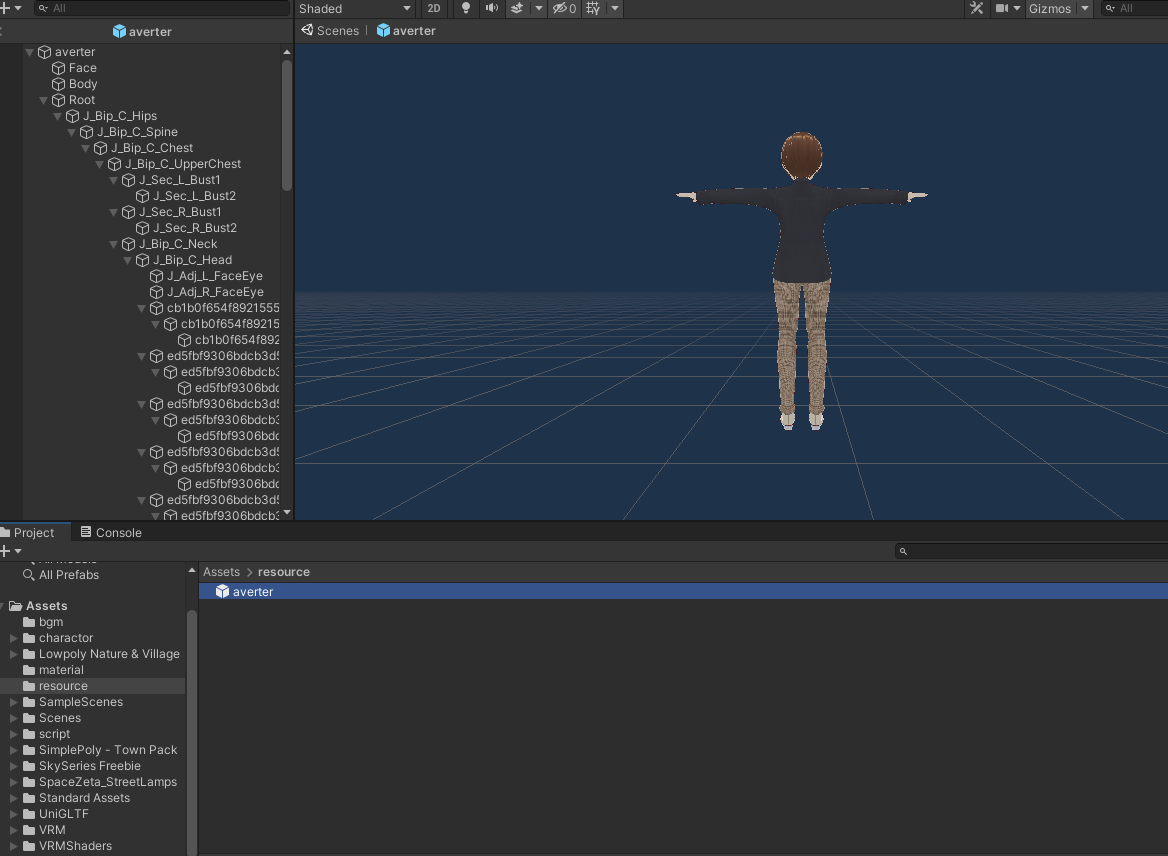
あとはコードを書く。雑ですが、とりあえず動く用の検証コード。
using System.Collections;
using System.Collections.Generic;
using UnityEngine;

public class Player : MonoBehaviour
{
    private GameObject player;
    private GameObject playerPrefab = null;
    // Start is called before the first frame update
    void Start()
    {
        Vector3 pos = Vector3.zero;
        player = MakePlayer(pos);
    }

    // Update is called once per frame
    void Update()
    {

    }
    private GameObject MakePlayer(Vector3 pos)
    {
        GameObject player = null;
        playerPrefab = playerPrefab ?? (GameObject)Resources.Load("averter");
        Debug.Log("averter make");
        player = (GameObject)Instantiate(playerPrefab, pos, Quaternion.identity);

        return player;
    }
}
これをヒエラルキー上に配置したGameObjectにアタッチすればOK。 出現位置も調整可能。
■
素のcentos上にpython3.10環境を構築する
- 仕事でpython3.10を使うことになり、普段から使用しているcentos7にインストールしようとしてハマってしまったため、記事を作成した。
- ハマる人はズドンとハマると思う。
- 失敗の仕方がこれまた悲劇的で、pythonインストールでビルド長時間かかった挙句、失敗するのでダメージでかく、他の方の救いになれば。
- でもそろそろcentosじゃなくてubuntsへ作業環境替え時かも。いろいろ変わったし。
- 一部testが失敗するので他に何かしなきゃかもだけど、とりあえずpythonとpoetryは使えるので、お試し開発とかの使用には耐えうるはず。
手順
- 必要なパッケージの取得yum
yum install -y bzip2 bzip2-devel gcc git libffi-devel openssl openssl-devel readline readline-devel sqlite sqlite-devel zlib-devel
- pyenvのインストール
git clone https://github.com/yyuu/pyenv.git ~/.pyenv
echo 'export PYENV_ROOT="$HOME/.pyenv"' >> ~/.bash_profile
echo 'export PATH="$PYENV_ROOT/bin:$PATH"' >> ~/.bash_profile
echo 'eval "$(pyenv init -)"' >> ~/.bash_profile
source ~/.bash_profile
pyenv install -l
- openssl
- こいつがcentos7だとopenssl-1.1.1が入っていない(openssl-1.0が入っている)ので、pythonビルドに失敗する
- python3.10からはopenssl1.1.1が必須になった。
sudo curl https://www.openssl.org/source/openssl-1.1.1.tar.gz -o /usr/local/src/openssl-1.1.1.tar.gz
cd /usr/local/src
sudo tar xvzf openssl-1.1.1.tar.gz
cd openssl-1.1.1/
sudo ./config --prefix=/usr/local/openssl-1.1.1 shared zlib
sudo make depend
sudo make
sudo make test
sudo make install
- opnensslのパス類を追加
echo 'PATH=/usr/local/openssl-1.1.1/bin:$PATH:$HOME/bin:/usr/local/openssl-1.1.1/lib:/root/.rbenv/bin' >> ~/.bash_profile
echo 'LD_LIBRARY_PATH=$LD_LIBRARY_PATH:/usr/local/openssl-1.1.1/lib' >> ~/.bash_profile
echo 'export LD_LIBRARY_PATH' >> ~/.bash_profile
echo 'export PATH' >> ~/.bash_profile
source ~/.bash_profile
- python 3.10のインストール
CFLAGS=-I/usr/local/openssl-1.1.1/include LDFLAGS=-L/usr/local/openssl-1.1.1/lib pyenv install -v 3.10.8
pyenv global 3.10.8
- ついでにpoetry のインストール
pip install poetry
- これでうまく使えるはず。環境構築はタスクに入る前の作業だから、ここで詰まると色々しんどい。けど環境構築が開発の中で一番時間かかるところ(自分は)なんだよねー。誰かの助けになれば。
